
How to Manually Add Licenses & Certification to Your LinkedIn Profile
If you complete a course or certification with one of the LinkedIn partners, they’ll send you an email that allows you to automatically add this accomplishment to your profile following these steps:
- Click the link in the email to start the process. You may be prompted to sign in to LinkedIn.
- Enter the information as prompted. The certification and degree information will no longer autofill, but you can add the relevant information directly.
- When finish Click Save.
Your certification will then appear under the Certifications section of your profile. If you have any questions about the certification email, including its content, please reach out to the LinkedIn partner organization.
To Manually Add Licenses & Certification to Your LinkedIn Profile please follow these steps:
First, go to www.linkedin.com
Then login to your LinkedIn Profile account by typing in your email and password at top of the left side of the sing in page of LinkedIn.
Once you login to your LinkedIn Profile, click on the me icon at top left side of your LinkedIn home page
Once you click on the me icon, then click on view profile under your profile photo and title.
 When your profile opens, locate the Add profile section under your profile photo and title and click on it. The Add profile section once you click on it will expand and you will see Licenses & Certifications section under Background information. Next to the Licenses & Certifications click on the plus sign to input your Certifications.
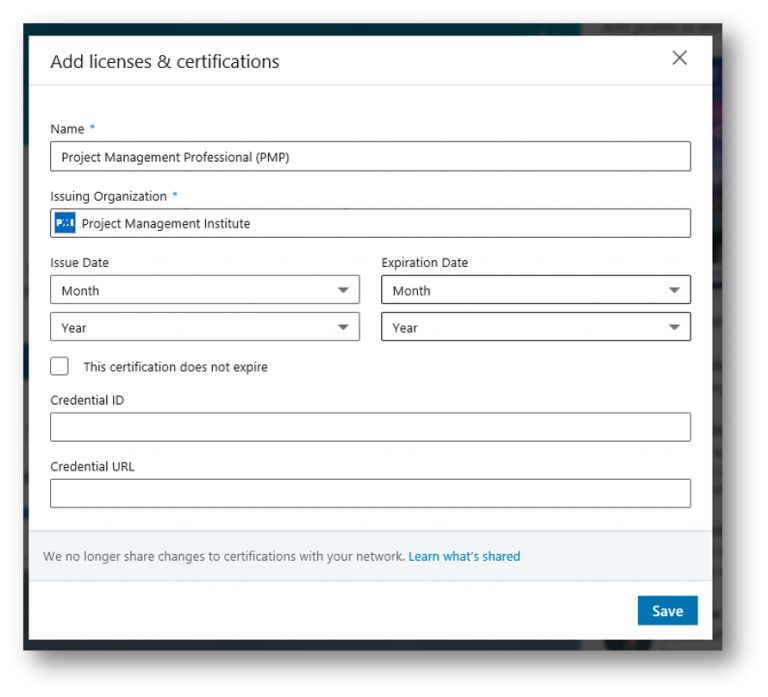
When the Licenses & Certification page opens up please type in the name of license or certification under Name section, for example if you got PMP Certification you will enter in Project Management Professional (PMP) under the name section.
Then under Issuing Organization please type in the name of organization Institute that sets standards for the accreditation of certificate. For our example of PMP Certificate, the Issuing Organization would be Project Management Institute.
Then under Issuing and Expiration Date section, enter in the issue date and expiration date if applicable. If not applicable, please check the box under it that says, “This certification does not expire”
Then enter in Credential ID and Credential URL
When done, click save at bottom right side to finish adding Licenses or certification.